Saturday 31 January 2015

Free Quilt Tutorial

This week I am working on a table topper for a friend's birthday present. Here it is so far...


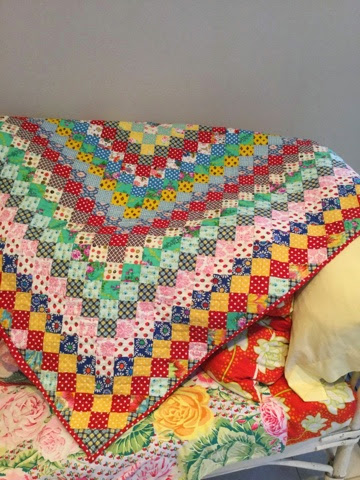
Do you want to make one too? It's easy! Let me show you how. This week I will get you started. This blogpost will tell you what you need to gather from your " room of requirements " ( also known as the sewing room or local quilting store ), what to cut, and how to make the blocks. Several tips and tricks are included , so read on. 

To make a 36 1/2 " square table topper  you need the following requirements


* 36 fabric squares 5 inches x 5 inches. ( charm packs are perfect) These squares are for the blocks.
* 3/4 yard cream fabric. From this cut  72 squares 2 1/4 inches x 2 1/4 inches for the blocks and 4  (width of fabric) 2 1/2 inch strips for the first border.
* 1/2 yard fabric for outer border. Cut this into 4 (width of fabric) 3 inch strips.
That's all the cutting done.

For later, you will need 
* approx 1  1/2 yards for backing 
* 1/2 yard for binding 
* batting - approx 40 inches square . I use cotton batting, no scrim if hand quilting. 

Of course- you need your usual sewing supplies and a sewing machine.


Now, you have a choice here. If you want to be super accurate ( always a good idea ) you should now rule a diagonal line from corner to corner for each 2 1/4 " cream square with a pencil on the wrong side of the fabric. 


If you don't want to do that , and feel confident in your sewing machine skills I will show you a way to sew the squares using a tape guide later.

To make a block, take a 5 inch square and place a 2 1/4 inch cream square in the top left hand corner, right sides together. Pin in place.


Stitch along your ruled line. If you haven't ruled a line, you can place a piece of tape ( I use painter's tape) on you sewing machine as shown below. I place it in line with the stitch line of my machine. I line up the corners  of the cream square to be  sewn and away I go. 


Continue to stitch the cream squares on all of your 5  inch squares .  I do chain piece, taking care not to overlap pieces!


Repeat on the opposite corner of the 5 inch squares.


Carefully trim off the corners, cutting 1/4 inch from seam as shown


Open and press seams.   Hint - press the seams so that they run the same way , as shown below. This way , when you assemble the blocks, the seams will nest together neatly! 


Voila! You now have 36 blocks that look like this. 


The fun begins designing your arrangement. I love this block because it can be arranged in different ways. Like this.....


Or this....


or this


Which way will you put your blocks together? Next post - joining the blocks.
Happy sewing! Miriamx 


Sunday 25 January 2015

Trip Around The World - a Finished Quilt!

There are some quilt projects that are just wonderful to make. When I joined Brigitte Giblin's Trip Around The World Facebook group last year I really had no idea what I was signing up for.


I am a great admirer of Brigitte's work, and was attracted to the depression era TAW quilts where you use what you have, and make do. The project was completely done by hand, including the quilting, and I loved every moment of the journey. I love the quilt that resulted, and thank my fabric swap buddy Molly Lamb for her contribution of the divine strawberry print.


The one fabric we had to use was a red spot. I chose to also bind in the spot, to match the centre square, and I am pleased with how it all came together. 


Happy Australia Day and Happy Sewing, Miriamx 


Monday 19 January 2015

In a Bind

Summer days and quilting? They do go together if you can find a cool place and pair it with some ice cold refreshment! 

This week has been one for hand quilting my Trip Around the World Quilt. 


This quilt has been hand pieced using 2 inch squares. Each quarter inch seam has been eye-balled. I have not measured one! I decided to do the same with with my cross hatched hand quilting. I stitched each line eye- balling them through the centre of each square. A challenge to be sure, but so satisfying and restful. Zen quilting! 


I am now up to the binding and the red dot really brings the quilt together perfectly.


Binding takes a bit of time, but really is the 'icing on the cake' for a quilt. I have 3 sides to go , and then a finished quilt reveal in my next post.

Happy sewing, Miriamx 


Sunday 11 January 2015

Quilt top in progress

Cooler weather means happy quilting time! My latest quilt top has grown to look like this so far.


My apologies for the poor quilt top photo quality, but quilt tops alone, before the support of the quilting layers, are difficult to capture, especially when they are bigger than my design wall. It looks like it is blowing in the breeze.

The back is going to be a scrappy pieced affair, including squares, log cabins and strip pieces with mitered corners


This quilt back is really using up the left over fabric scraps from the quilt top. Nothing is wasted.

I hope your sewing year has got off to a flying start too. 

Happy sewing, Miriamx 


Sunday 4 January 2015

Sewing up a storm

The first week of January has been wonderful, despite the oppressively hot weather Sydney has been experiencing. Sitting in front of a big fan I have been stitching away.

Here are the blocks


Here they are on point


I love the way the placement of the colours and shapes lead your eyes around the quilt. There always seems to be something interesting to notice. 

I have now been playing with ways to set the blocks into a cohesive pattern for a quilt top and I will show you on my next post. What I can tell you is that there is no wastage of fabric, as the left over strips can be put together to make a pieced backing


The quilt pattern will be available soon.

I hope that 2015 has gotten off to a great start for you too.
Happy sewing, Miriamx


<a href="http://www.bloglovin.com/blog/13060515/?claim=4rpagrxa5y7">Follow my blog with Bloglovin</a>